
Zoom

For high resolution monitors, click on the zoom button. The zoom button is located below the red Exit button.
The Dynamic Interface
Now the user can switch the peripherals to other port pins.
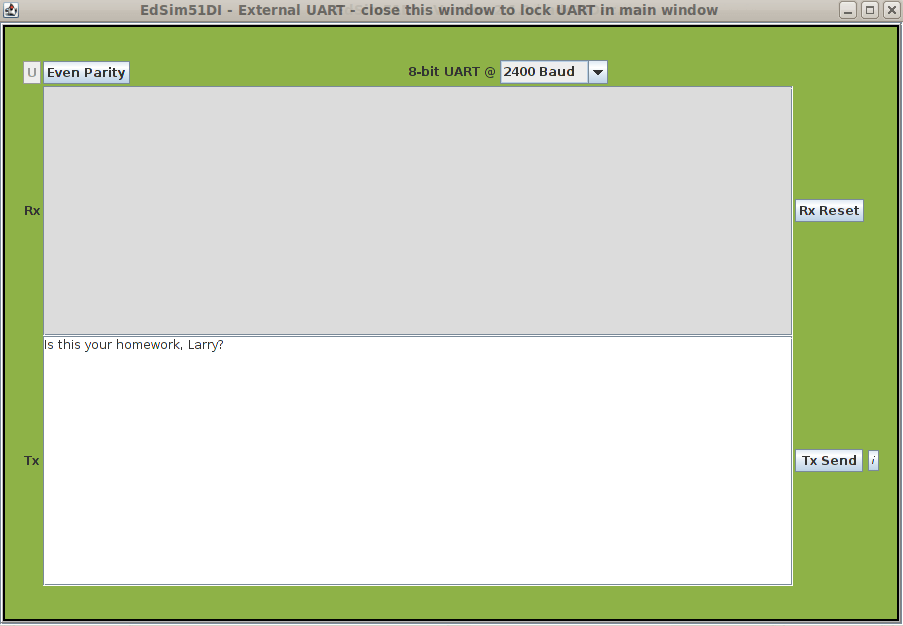
Unlock the External UART
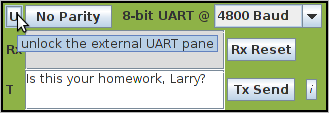
Clicking on the button marked U at the top left of the external UART places the UART in a separate frame, as shown below. This frame has much larger text windows for transmitted and received text.
Simply close this frame to lock the UART back in the main window.
Syntax Highlighting
Now, assembly code written in EdSim51 is automatically syntax highlighted. Instructions are coloured blue, assembler directives (such as ORG, USING, etc) are coloured purple, aliases (for example, the assembler replaces TMOD with the address of TMOD) are coloured orange and comments are coloured green.
Switching off syntax highlighting: if you wish to turn off syntax highlighting, simply right-click anywhere in the assembly code window and respond to the prompt.
Change the System Clock Frequency
Originally, the simulator ran with a system clock frequency of 12 MHz. Now the user can enter a value for the system clock frequency in MHz.

UART Transmitting HEX Data
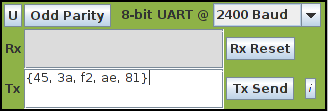
Up until now, the external UART only transmitted text – whatever the user typed in the Tx field was transmitted to the 8051. Now, a list of 8-bit numbers (written in HEX) can be transmitted. To do so, the user encloses the list in curly braces, each number separated by a comma, as shown in the image opposite.
When text is transmitted, it is terminated by 0DH. This is not the case with a list of numbers. In the example shown opposite, the four numbers 56, 3a, 23 and e7 are transmitted, nothing more.
If the user wishes to send {56, 3a, 23, e7} as text rather than a list of 8-bit numbers, the text is escaped using the \ character. Therefore, \{56, 3a, 23, e7} in the Tx field would result in {56, 3a, 23, e7} followed by 0DH being transmitted to the 8051.
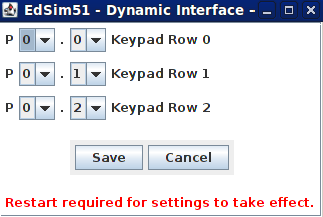
Keypad Modes
Now the user can select from three modes of operation:
- Standard – any number of keys can be closed at the same time.
- Pulse – once the mouse button is released the key reopens.
- Radio – in radio mode only one key at a time can be closed.
Keypad And External 1 Interrupt

Until now the keypad could only be implemented using busy-waiting. It can still be implemented in that manner, but it can also be used together with the 8051 external 1 interrupt pin, P3.3.
Note: this pin, P3.3, is also used by the display-select decoder, therefore multiplexing of the 7-segment displays cannot be implemented together with the keypad interrupt. To multiplex the displays and use the keypad at the same time, the keypad must be implemented using busy waiting.
Intel HEX Reader/Writer
You can now save your source code in Intel HEX format. Or you can write C code for the 8051 using one of many available 8051 C compilers, then import the HEX code into the EdSim51 Simulator.

Simulator Window Update
As with many microcontroller simulators, EdSim51 allows the user to either step through a program, executing a single instruction per step, or to run the program continuously. In the original EdSim51 design, when running a program, the simulator would execute one instruction, update the screen, pause for a quarter second, then proceed with the next instruction and so on. This allowed the programmer to observe changes in the hardware and registers for each executed instruction. However, while this is very useful for debugging, it meant the user would need to wait a long time for things to happen (examples: data transmitted on the serial port to appear on the UART, an LED flashing at half second intervals, etc).
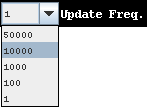
The best of both: now the user has the choice. Using the Update Freq. drop down menu (shown opposite) the programmer can choose how often the screen should be updated. The choices are: update the screen after every instruction execution (the default), after 100, 1000, 10,000 or 50,000 executed instructions.
Type in a value: the options available from the menu may not be appropriate. Therefore, the user can now enter a number rather than select a value from the list. For the entered number to take effect, the user must hit Enter on the computer keyboard.
Now on to the User’s Guide
